Before delving into the how of automation testing using Selenium, let me talk about the why.
Over the past couple of years, the demand for automation has increased at an unprecedented speed and scale as it indispensably minimizes the testing time, eliminate repetitive human tasks and make life easier. The advent of an open source automation testing tools, such as Selenium, has significantly reduced the demand and scope of manual testing.
Needless to say, every testing has its own quirks and best practices! However, there are certain standard best practices that generally apply to most automation, too. Let’s review the best practices of automation testing. You may also like to check out our previous blog post on executing Automation Testing using Selenium.
What is Selenium and why we chose it over other automation testing tools?
Selenium is an extensively used automation tool because of a number of reasons besides being free. The open source tool is supported by a great community and allows QA engineers to write/run test cases in Java, C++, perl, PHP, Python, Ruby, and Scala.
The growing demand of automation industry has persuaded many market leaders to come up with better alternatives. However, all are not open source and free. Check out the list below for the paid automation tools:
- TestingWhiz by Cygnet Infotech
- HP - QTP by HP
- TestComplete by SmartBear Software
- Ranorex by Ranorex GmbH
Test cases in Selenium
Implementing test cases in Selenium using Java is not that difficult, but one needs to know how to locate an element in the browser and take required actions.
Locating elements in browser using Selenium
Well, there are several ways we can locate elements in Selenium. Below-mentioned is the most common methods:
- By ID:
- Syntax : driver.findElement(By.id(“element id”))
- By CLASS:
- Syntax: driver.findElement(By.className("element class"))
- By NAME:
- Syntax: driver.findElement(By.name("element name"))
- By TAGNAME:
- Syntax: driver.findElement(By.tagName("element html tag name"))
- By CSS Selector:
- Syntax: driver.findElement(By.cssSelector("css selector"))
- By Link:
- Syntax: driver.findElement(By.link("link text"))
- By Xpath:
- Syntax: driver.findElement(By.xpath("xpath expression"))
Xpath
XPath is defined as XML path. In Selenium automation, Xpath is a syntax to find out any element on the web page using HTML DOM structure if the elements are not found by the common locator methods like id, class, name, etc.
The basic format of XPath is explained below.
Xpath=//tagname[@Attrribute=’value’]
To use Xpath in Firefox, we need to install FirePath. Currently, FirePath is not supported by Firefox 56 so avoid updating your browser.
Prerequisites:
- Eclipse IDE
- JDK 1.7 or more
- Latest Selenium JAR (3.5.3)
Here I have created a small test case for the demo where the following functionalities are supposed to work.
The test case is to:
- Open “http://example.com” in web browser
- Enter first name and last name
- Click on submit
To open chrome browser through Selenium, you need to download chrome driver from “https://sites.google.com/a/chromium.org/chromedriver/downloads”.
Github link for the complete project: https://github.com/chirag-munjayasara/automation-testing
Creating project to write test case
Following are the major steps involved in creating a project in selenium:
- Open IDE
- Launch your own Workspace
- Create a new JAVAEE project
- Give project name
- Click next
- Click next
- Click finish
Your project is created. Now you can create java file in the package.
Right-click on the project name -> new -> package. Give package a name and then click finish.
When you will expand your project folder you can see the below structure.
Project Name
Java Resources
Src
Package name
Libraries
Now create java file to write test cases.
Follow the below steps to create a java file:
- Right click on package name -> new -> class
- Give class name (xyz)
- Click finish
After creating java file, you will see the below directory structure.
Project Name
Java Resources
Src
Package name
xyz.java
Libraries
Follow the below steps to add Selenium libraries to the project:
- Right click on Src folder
- Build Path -> Configure Build Path
- Click on Libraries Folder
- Click on Add External JARs…
- Select the Selenium JARs that you have download
- Click Apply and Close.
Selenium library structure
Project Name
Java Resources
Src
Package name
xyz.java
Libraries
Referenced Libraries
Selenium-Server Standalone-3.5.0.jar
Your project is ready. Just write below test case and run in Selenium. :)
Example 1: Here I have used “By.name” to locate text box and “By.id” to locate submit in the browser.
By.name("firstname").sendKeys(‘localtechx’);
By.name("lastname")).sendKeys("Bound");
By.id("submit")).click();
See the screenshot below for an example:
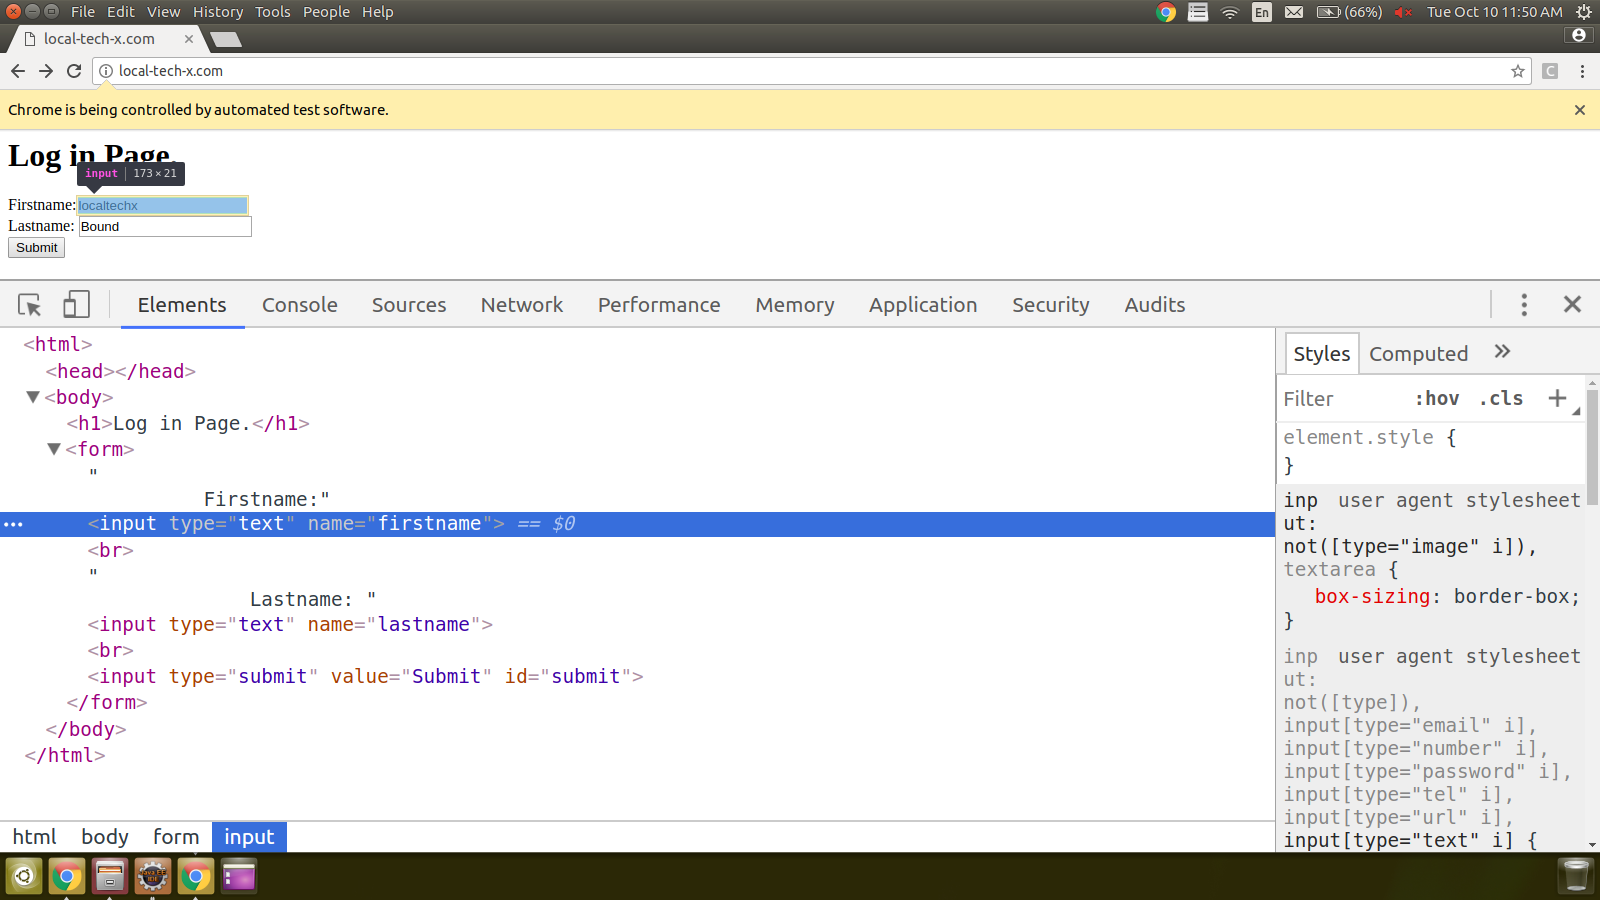
SendKeys is used to pass value in the text-box.
Use By.id method and perform click operation to locate submit button.
Example: 2 Selecting radio button, checkbox, select option, locate anchor tag and pause the execution.
Following is an example to locate HTML elements by using different methods like By.partialLinkText, By.tagName, By.xpath etc.
Lastly, to generate proper test results and understand the output, we need to use test framework - TestNG - as Selenium test does not generate proper format of test results.
Inspired from JUnit framework, TestNG covers all kind of tests like unit, functional, end-end, integration etc…
Advantages of TestNG over JUnit
- TestNG annotations are easier to understand when compared to JUnits
- Generate logs
- Create an HTML report
- Dependent method
Installing TestNG in Eclipse (why we need to install in Eclipse and what is the use of it?)
- In the menu bar, click “Help”
- Select Eclipse Marketplace option
- Type TestNG in the dialog box and then press enter
- Click install
- New dialog box will pop up, do not change anything and click on confirm
- Click finish by accepting the license.
- After installing, Restart the Eclipse.
How to create TestNG project and check whether above-mentioned cases run perfectly or not.
Follow the below steps to create TestNG project:
- Right-click on your package name, you will find the option TestNG
- Hover it and click on Create TestNG class
- Select necessary options
- Click on finish.
Console output

HTML report
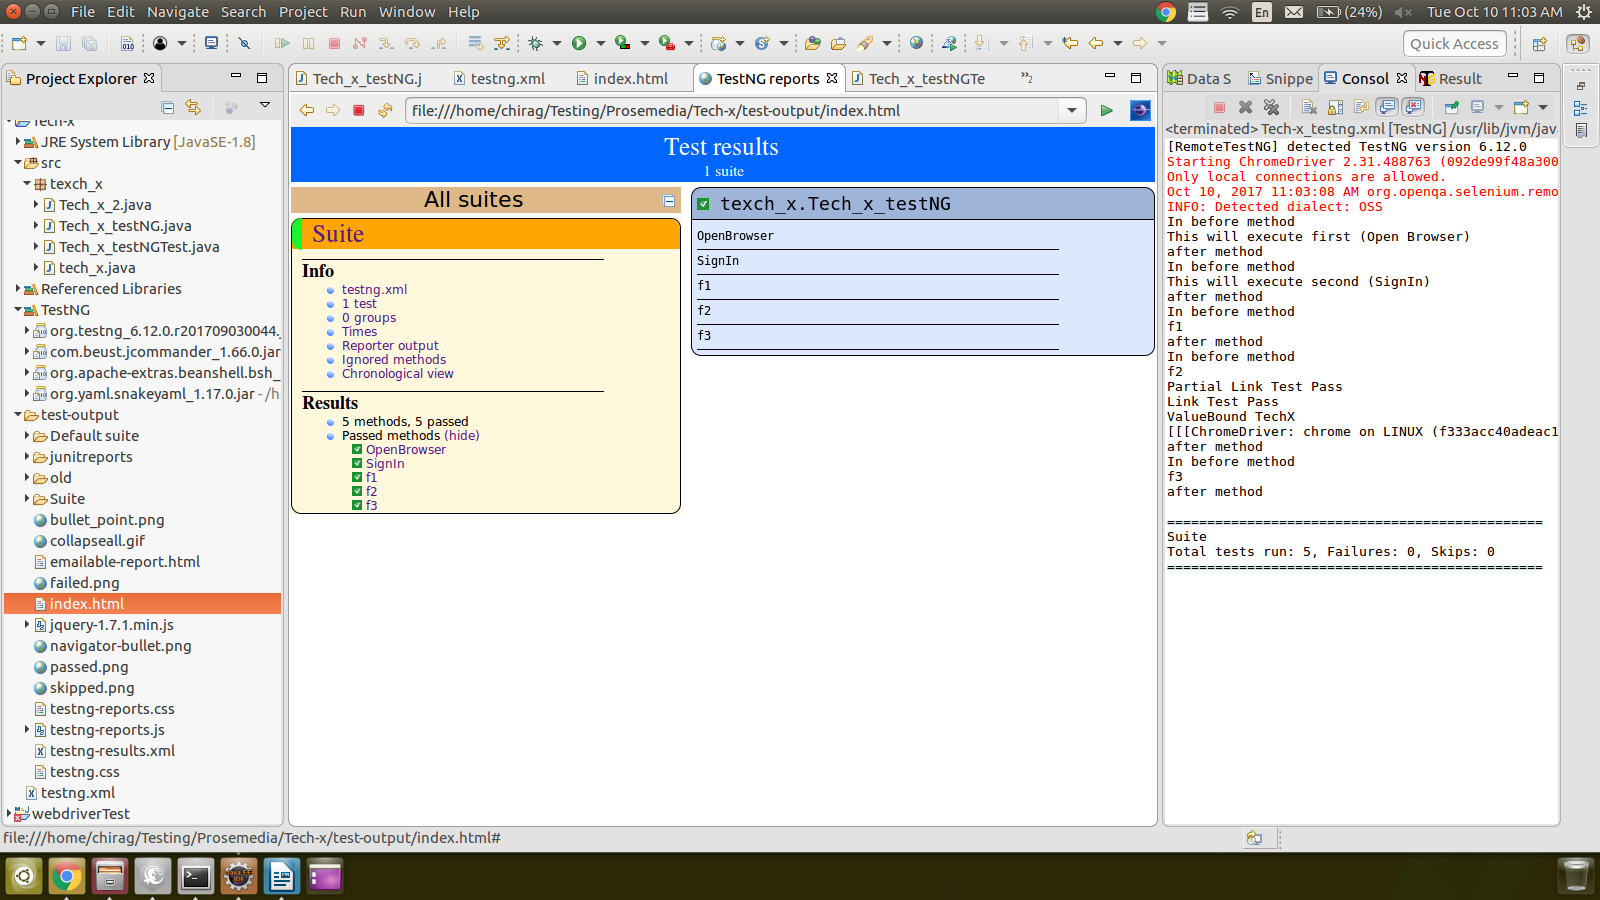
testng.xml
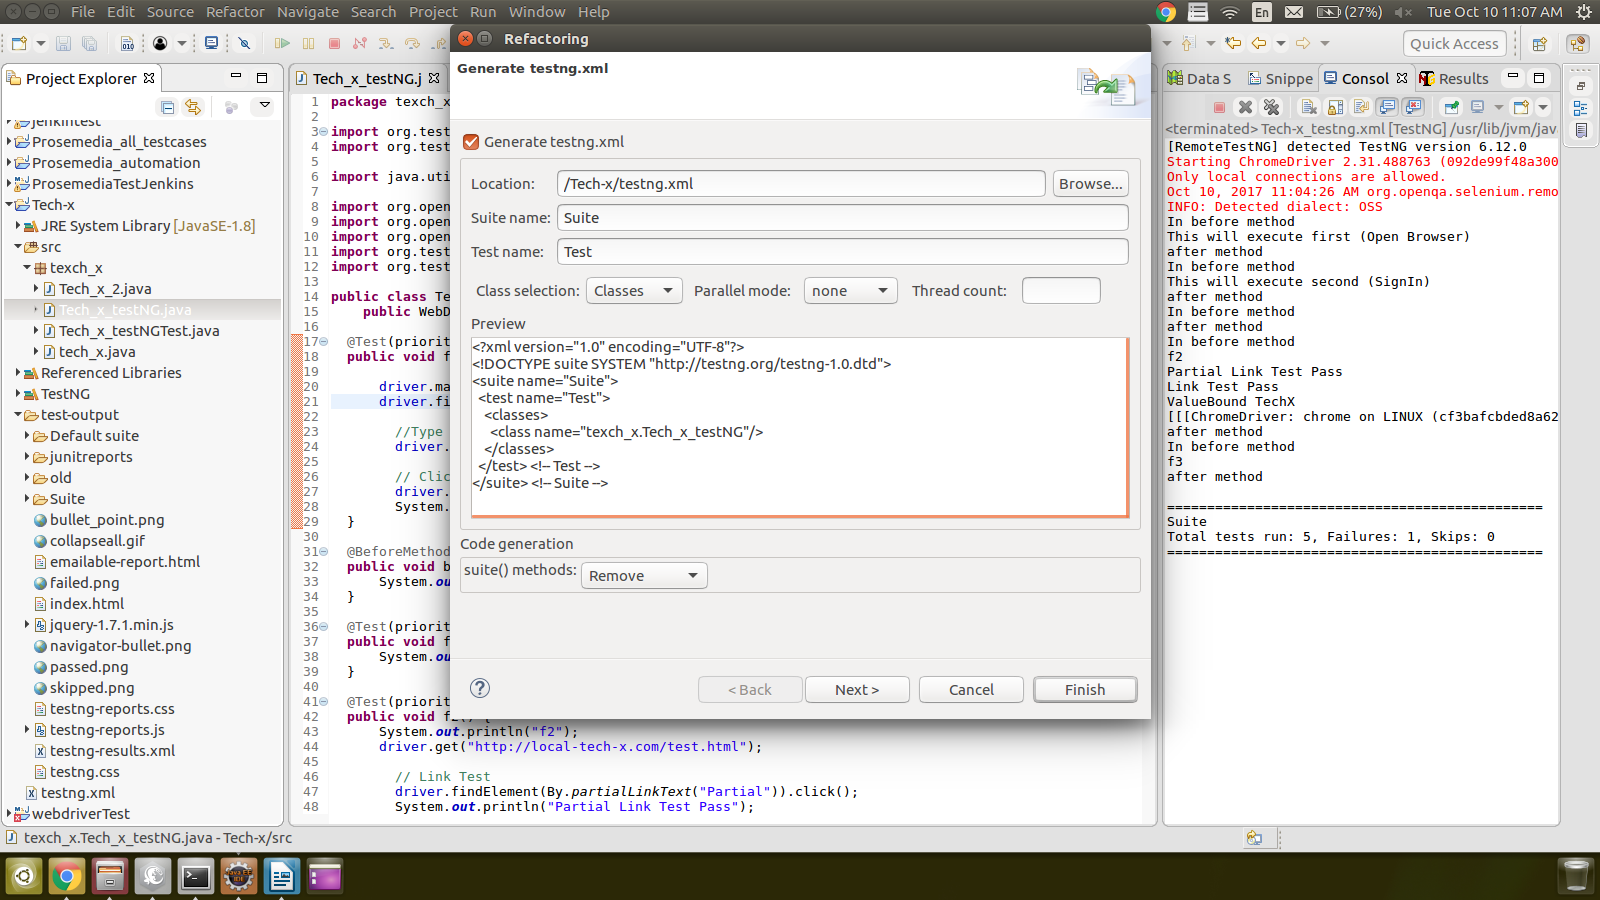
To handle multiple test classes, we need to create Testng xml file. After creating TestNG file, configure test run, set test dependency, include or exclude any test, method, class or package and set priority in the xml file.
Follow the below-mentioned steps to create an XML file and run test case:
- RIght Click on your Java file, you will find the TestNG option.
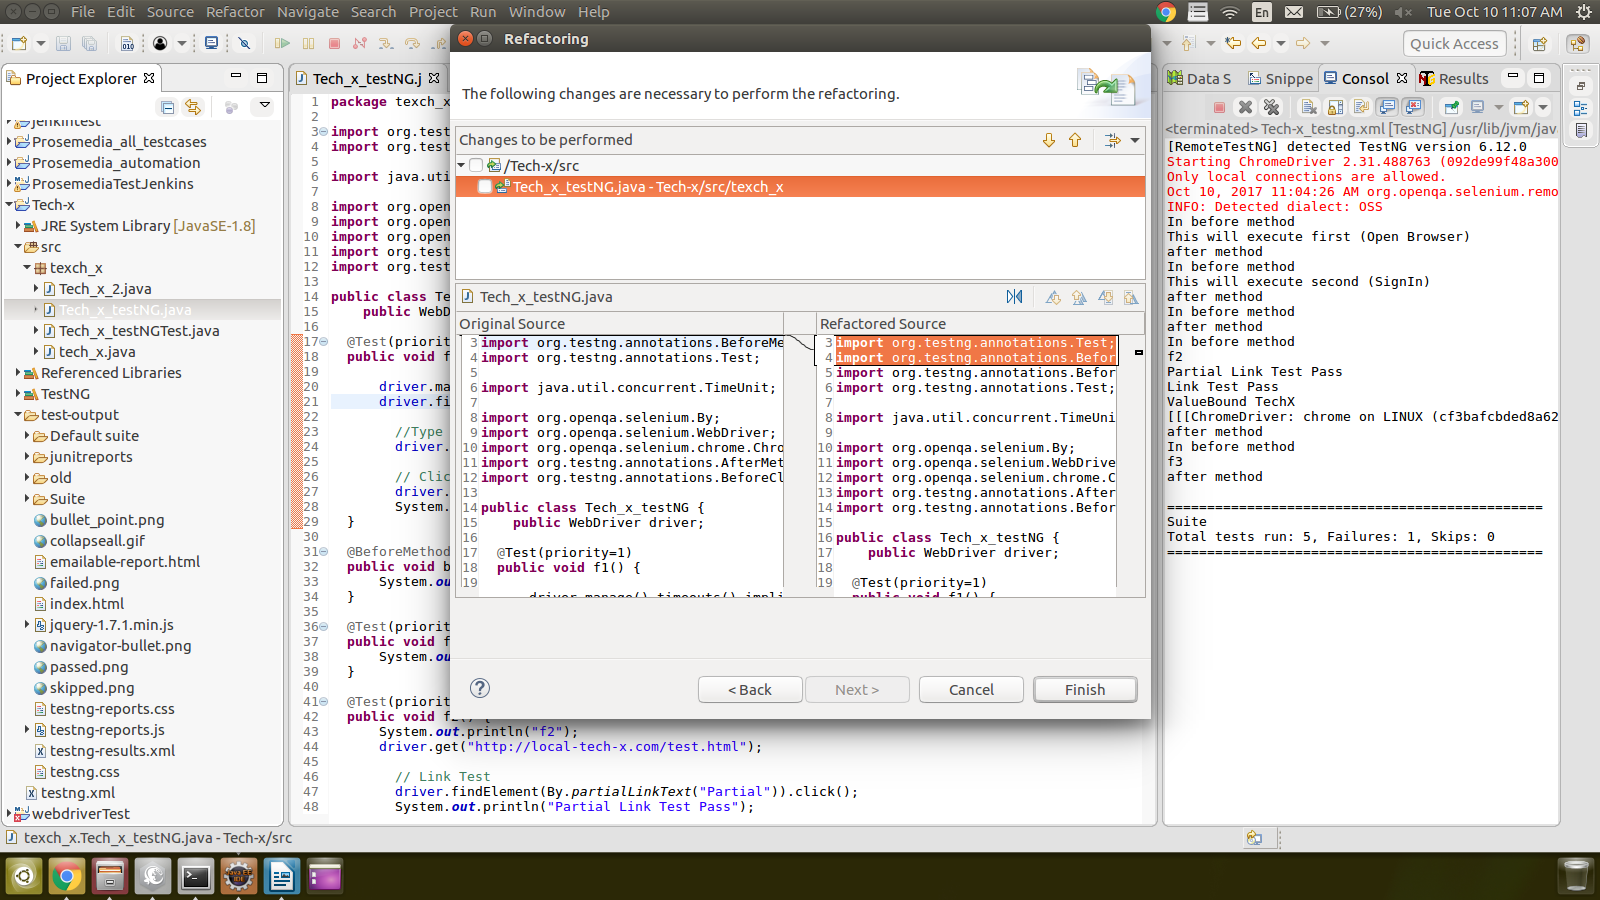
- Hover it and now select “Convert to TestNG”.
- Your testng.xml has been created.
- Now whenever you want to run your test case, just run this file. This will give you the same output as your .java file.
See the following screenshots for an example:
Basically, automation testing is an automation of a manual process. In software testing, in fact, it helps to execute pre-scripted tests on an application before its release into production. Though the scope of manual testing is decreasing, it is still prevalent in some of the industries. Testing method totally depends on the project requirement, budget associated with the project, and others.
This is what automation testing is all about.
Now you know the entire process related to automation testing using Selenium. I want to hear from you, which of the testing - automation or manual - have you find most useful? Please share in the comments section below.
Below given is a presentation on automation testing using Selenium.
References:


