To install Solr Java Runtime Environment (JRE) version 1.7 or higher is needed. On your terminal check your Java version.
$ java -version
If JRE is available it will show you the version number. And if you got no result is found, then you have to installJRE. You can install the same using simple command in terminal
$ sudo apt-get -y install openjdk-7-jdk
$ mkdir /usr/java
$ ln -s /usr/lib/jvm/java-7-openjdk-amd64  /usr/java/default
Now we have JRE installed, lets install Solr.
Installing Solr is pretty easy. Browse to folder you want to install Solr and download the latest copy of Apache Solr from here - http://www.apache.org/dyn/closer.cgi/lucene/solr
$ cd /opt
$ wget http://archive.apache.org/dist/lucene/solr/5.2.0/solr-5.2.0.tgz
Untar the tar ball and go to solr folder.
$ tar -xvf solr-5.2.0.tgz
$ cd /opt/solr-5.2.0
Now to install Solr as service run this command.
$ bin/install_solr_service.sh --strip-components=2
This will install Solr as a service and run in the background on your web server. By default it uses the port number 8983.
You can change default port number to one of your choice. Just run this line.
$ bin/solr start -p 8984 // Here 8994 would be your new port number
Your Solr should be up and running. Browse to http://your_ip_address:8983/solr
You can also stop Solr as service from the solr directory.
$ bin/solr stop
Check Solr Status if it is running or not.
$ bin/solr status
We have successfully installed Solr but open for everyone who knows our IP address. we need to secure it.
For authentication of solr server url http://your_ip_address:8983/solr we have to do some configuration.
Go to the folder and create a new file with name realm. properties
$ cd opt/solr/server/etc
$ nano /opt/solr/etc/realm.properties
Add username, password and role in this format -
USERNAME:PASSWORD, ROLE-NAME

eg.
solr : solr_123, solr-admin
Save this file.
Now Edit /opt/solr/etc/webdefault.xml and add the following:
Save webdefault.xml file.
Now Edit /opt/solr/etc/jetty.xml
Now restart your Solr server.
$ cd /opt/solr/
$ bin/solr restart
Check with default port if authentication is working or not by visiting http://your_ip_address:8983/solr
Now it must be asking for username and password. Use the Username and Password which you added in /opt/solr/etc/realm.properties to login.
You should see your Solr admin console.
Configuring Solr with Drupal 7
Get the latest version of Search API Solr Search from Drupal ( Apache Solr Drupal module didn’t worked with Solr 5.2.0 though it used to work with Solr 4.4 )
$ cd /opt
$ wget  http://ftp.drupal.org/files/projects/search_api_solr-7.x-1.8.tar.gz
$ tar -zxf search_api_solr-*.tar.gz
We need to copy Solr configuration files from Search API Solr Search module to solr configuration directory.
$ rsync -av search_api_solr/solr-conf/5.x/ /opt/solr/example/files/conf/
Create new Solr core for your website andcopy Solr configuration files to new core.
$  mkdir /opt/solr/server/solr/valuebound // Here valuebound is name of my Solr Core
$ cp -r  /opt/solr/example/files/conf/  /opt/solr/server/solr/valuebound/
Restart Solr now
$ cd /opt/solr
$ bin/solr restart
Open your Solr admin page - http://your_ip_address:8983/solr
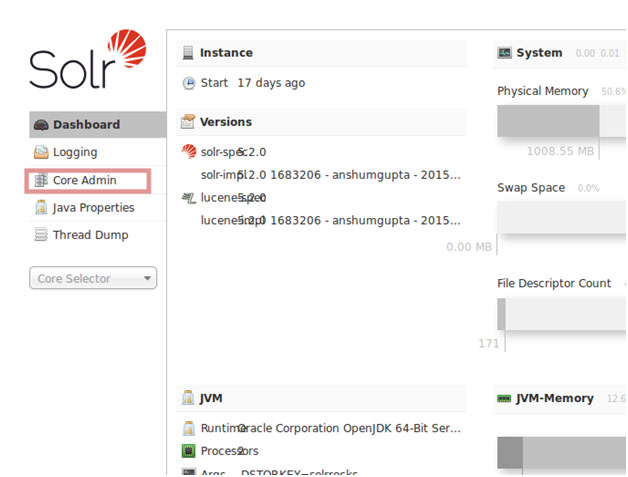
Click On Core Admin and create new core with same name which we used above to create Solr core directory.
Once again restart Solr.
Now we have Solr configured, secured with new core, lets configure our Drupal site to use Solr for search. Install below modules -
Enable these modules in your site module list page. Now we will create one search server and one search index to be used with Solr.
For Creating server and index we have to navigate to Search Api config page (http://valuebound.com/admin/config/search/search_api)
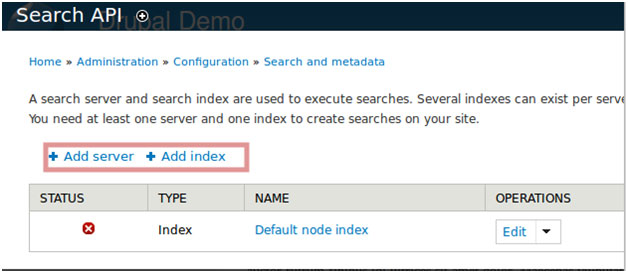
Click on Add server link. Name your Solr Server along with description and in Service class Select Solr As a Service.
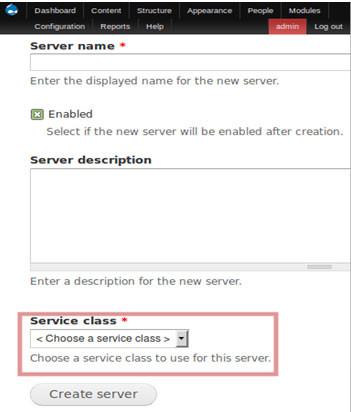
When you will select Service Class As Solr Service it will expand and you will below screen.
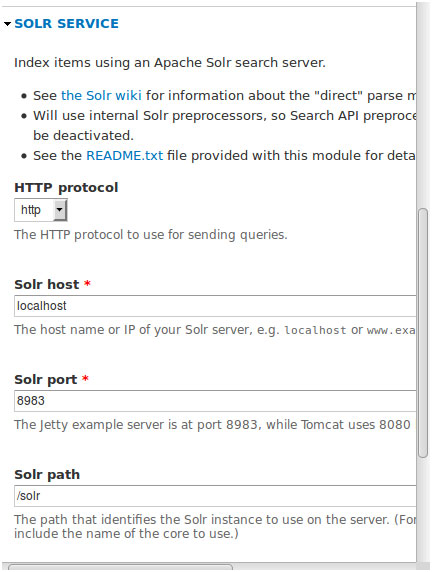
We have four field
- HTTP protocol
Select http - Solr host
If no authentication enabled, you have just add your solr server hostname or IP address of your server where Solr is installed.
If you have Authentication enabled then server name would follow this pattern
USERNAME:PASSWORD@IP_Address
eg. solrserverusername:solrserverpassword@xxx.xxx.x.xxx - Solr port
Port number you have used in during installation of solr server eg. 8983 - Solr path
In our case this would be /solr/valuebound
We have added Search server. Now we also need to add Index server. Navigate to Search Api config page (http://valuebound.com/admin/config/search/search_api) and click add Index server.
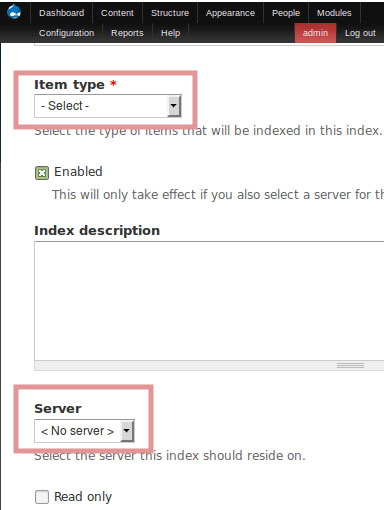
Select Item Type “node” and select server which is created in previous step. Check “Index items immediately” then create index.
We have configured Solr server with Drupal.
Next Index all Content with solr server. Your Drupal search result would be served thru’ Apache Solr Server now.


