
Installation of Drupal requires a Web server. We will be employing XAMPP package for the same purpose. XAMPP is a free and open source web server solution stack. It stands for (X-cross platform), (A-Apache HTTP Server), (M-MariaDB), (P-PHP), (P-Perl). XAMPP is hassle free and is widely used by developers all over to create a local web server.
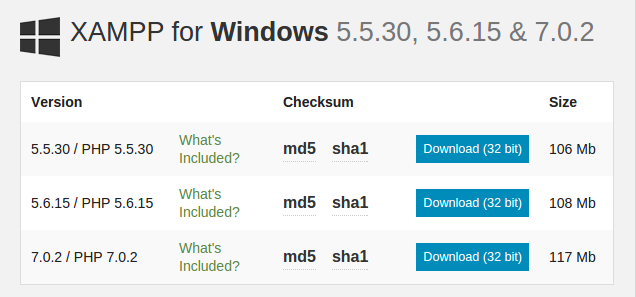
To install XAMPP, one can download it via the below provided link
https://www.apachefriends.org/download.html
On the basis of requirement of individual system and configuration one can install the XAMPP.
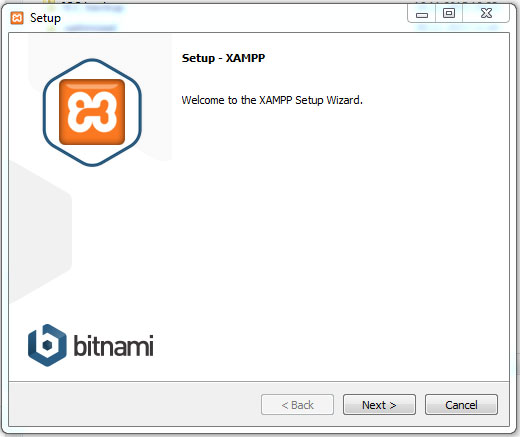
To begin installation, Open/double-click .exe file

Step 1: On opening the file, a XAMPP set up wizard will initiate:
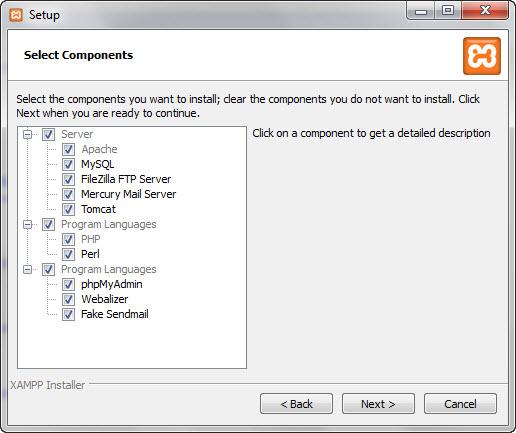
Step 2: Click next, a screen will appear where you can choose the components you wish to keep, on clicking next here you will be getting default components provided by XAMPP.
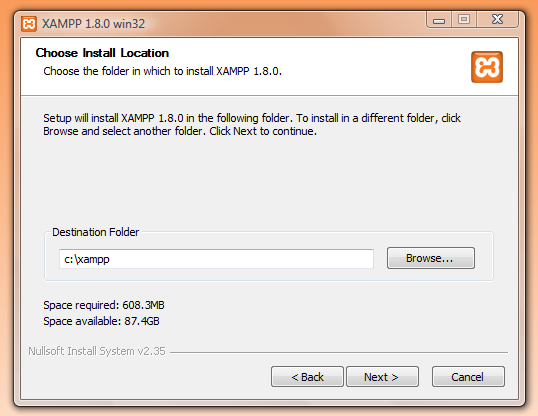
Step 3: Select the location in your system where you wish to install the XAMPP.
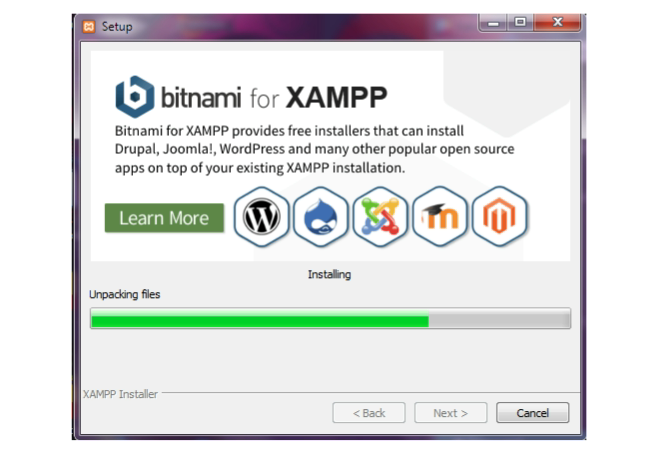
Step 4: Click on next to begin installation
Step 5: On successful completion of Installation, following screen should appear.
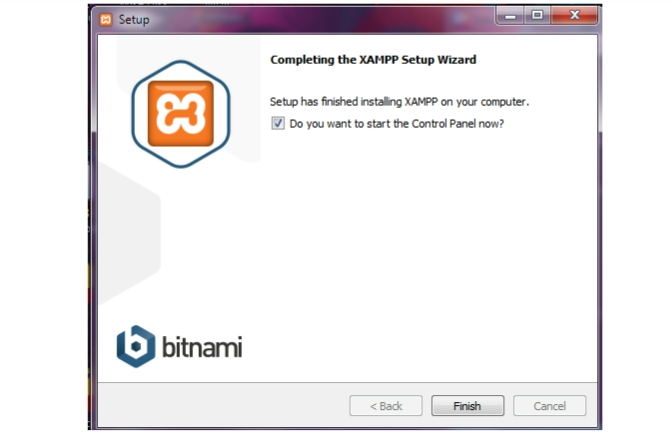
Keep the box checked (Do you want to start the Control Panel now),
Click on finish to complete the process, control panel screen will automatically launch.
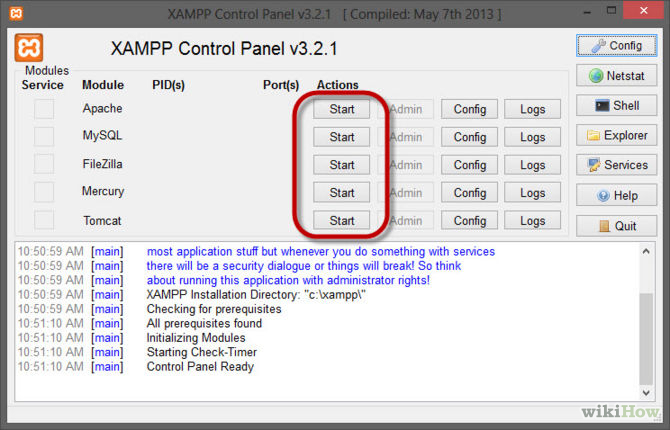
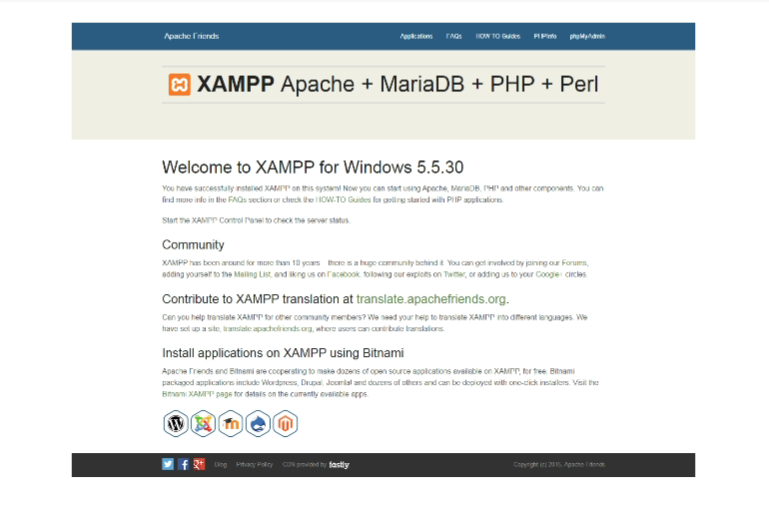
The above steps would concluded the installation of a local web server in your system, Apache and MySQL is running as we can see from the control panel. To check type 127.0.0.1/dashboard/ or localhost/dashboard/
Now since we have a local web server in our system, we can begin with Drupal 8 installation. We can download the latest Drupal 8 package from the below link:
Ref URL: https://www.drupal.org/news/drupal-8.0.0-released
Version: drupal 8.0.1
drupal-8.0.1.zip
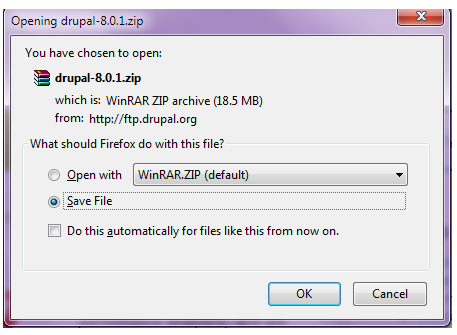
Click on Save file.
The next step is to install drupal in the system. It includes following steps:
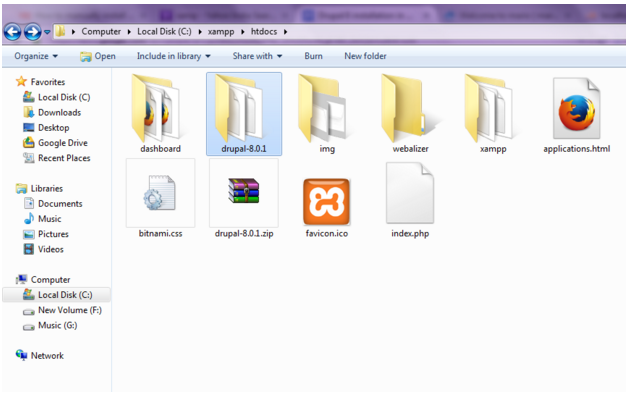
Step 2.1: Copy the drupal .zip file in “C:\xampp\htdocs” folder.
The path should look like this
Step 2.2: Extract .zip file.
Step 2.3: On your web browser, type 127.0.0.1/drupal-8.0.1, where drupal-8.0.1 is the extracted folder name.
The step to copy and paste the default.settings.php into settings.php and similarly create a “Files” folder under sites/default and give read write execute permission for all type of user.
Following above steps will take you to the drupal installation page

One can choose the language of installation by clicking on the drop down box where default language is English.
Step 2.4: Click on next and a profile selection page is opened, Standard profile is the default profile.
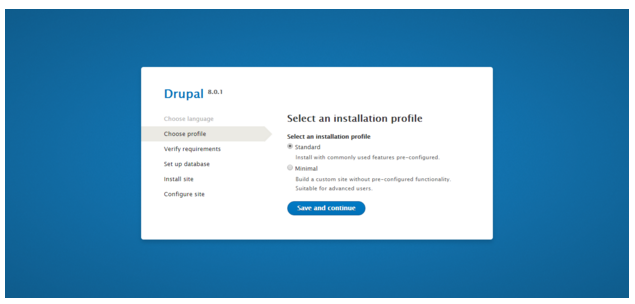
Step 2.5: Click on Save and Continue
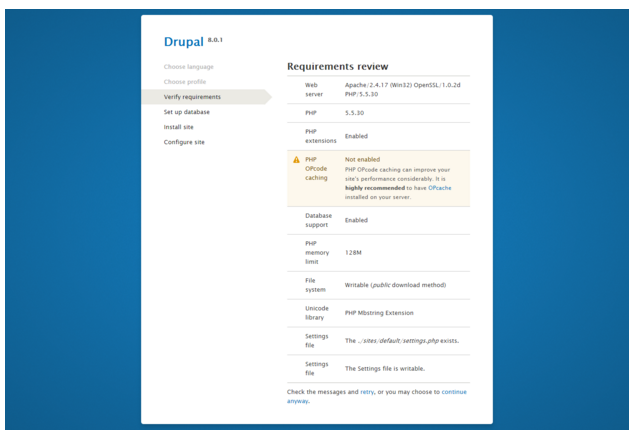
A requirements review page opens up that informs us about the requirements on various parameters viz web server, PHP version, library, holder permission, settings.php which are needed for the drupal to operate in our system.
Click on continue anyway which is at the bottom of the installation page
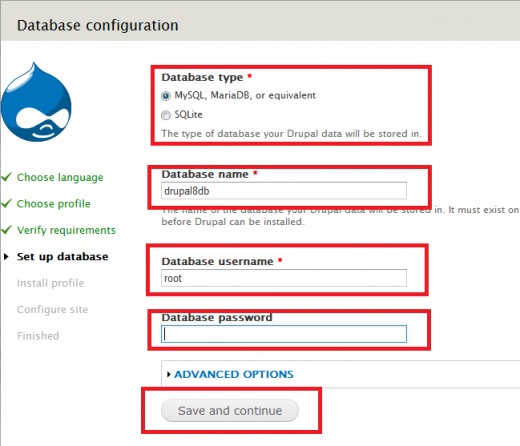
Step 2.6: To install drupal 8, we need a database which can be created by visiting URL localhost/phpmyadmin/serverdatabases.php
The above URL corresponds to phpmyadmin which functions as a data administrator for MySQL from where we can create, modify or delete databases; also execute SQL statements and manage users and permissions.
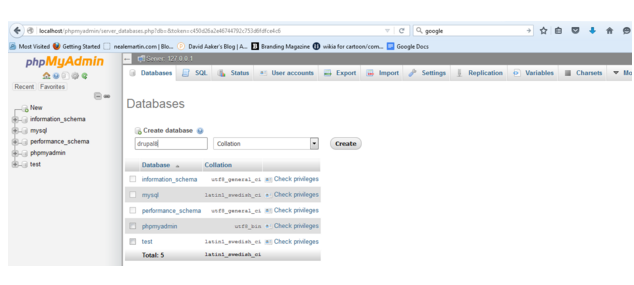
Any human-readable name could be given as database name, here we have provided our database name as ‘drupal8’. One can provide any similar name however it is suggested that a simple name is given. Underscores (_) may also be used.
After providing the name click on ‘create’.
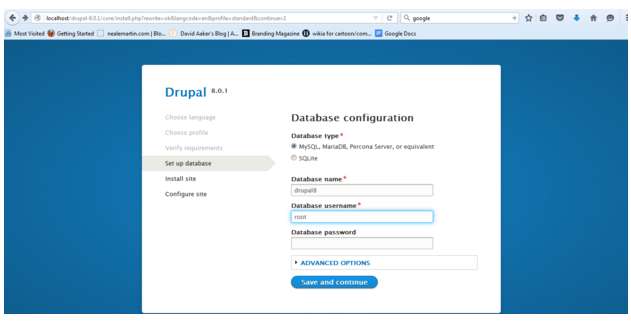
Please note that the name ‘drupal8’ given by us while creating the database becomes the name of the database name while installing drupal. The database username is root as we can see in the above screenshot, which is a default database username.
The password section is to be left blank in case there is no password assigned already.
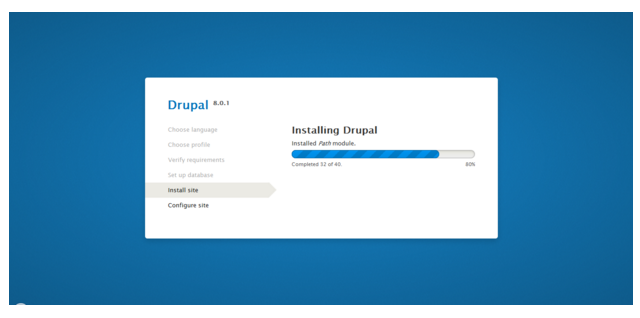
Click on save and continue. Installation should start.
After installation, configure site page will open which will need some details from us viz site name/site email address/username/password/Country/Time zone and update notification check boxes.
Details provided by us in this case are;
Site name -MyName (one can give any site name)
Site address - myname@gmail.com
username - admin(one can provide any username they like)
Password - choose a strong password.
Country - India
Timezone - Asia/Kolkata
checkbox for updates notification are ticked default.
Click on save and continue.
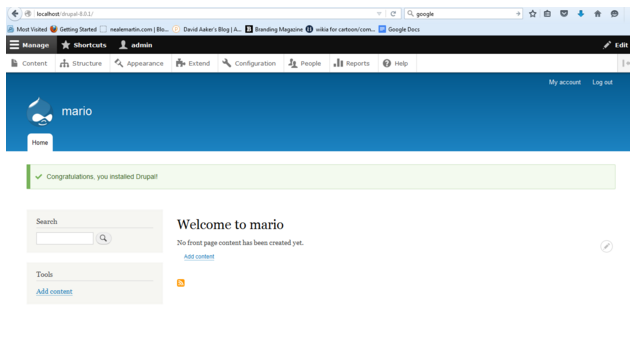
A window like above will appear that will notify that the Drupal has been installed in your system.
The URL for same is localhost/drupal-8.0.1 where drupal-8.0.1 is the folder name.