
Continuous Integration (CI) is rapidly becoming an integral part of software development process as it makes our monotonous and repetitive tasks a little less grindy. CI is a project development practice where developers integrate code into a shared repository frequently. Each Integration is then verified by an automated build that allows the team to detect problems in an early stage.
This post will walk you through the continuous integration with Jenkins and GitHub. Here we will install Jenkins, create Jenkins task and then configure it with GitHub.
Let’s get our arms around why Jenkins is so popular and why this is not just a hot topic, but an important best practice for developers.
Related: Git and GitHub for Beginners
Why Jenkins is so popular for Continuous Integration?
Jenkins is an open-source tool that tests and compiles the code. If everything is fine then it deploys the code for production else you will get a notification that builds has failed and you need to fix the bug/error. Similarly, Selenium - an automation testing tool - minimizes the testing time and eliminates repetitive human tasks.
Jenkins has an array of advantages, such as:
- Easily configurable
- Platform independent
- Rich plugin support
- Easy to create new Jenkins plugin if one is not available
Now you know why Jenkins is so popular, go ahead and install it.
Step-by-step guide to Install Jenkins
Follow the below steps:
Step 1: First install Java, using the following command.
$ sudo apt-get install openjdk-8-jre-headless -y
Step 2: Add the key and source list to apt for Jenkins.
$ wget -q -O - https://pkg.jenkins.io/debian/jenkins-ci.org.key | sudo apt-key add -
Step 3: Now create source list for Jenkins, using the below commands
$ sudo sh -c 'echo deb http://pkg.jenkins.io/debian-stable binary/ > /etc/apt/sources.list.d/jenkins.list'
Step 4: Update the packages
$ sudo apt-get update
Step 5: Now install Jenkins.
$ sudo apt-get install jenkins
Step 6: After installing Jenkins. Go to: http://your_ip_address:8080 and run the following commands to get admin password.
$ sudo nano /var/lib/jenkins/secrets/initialAdminPassword
Step 7: Now copy the password and paste into browser.
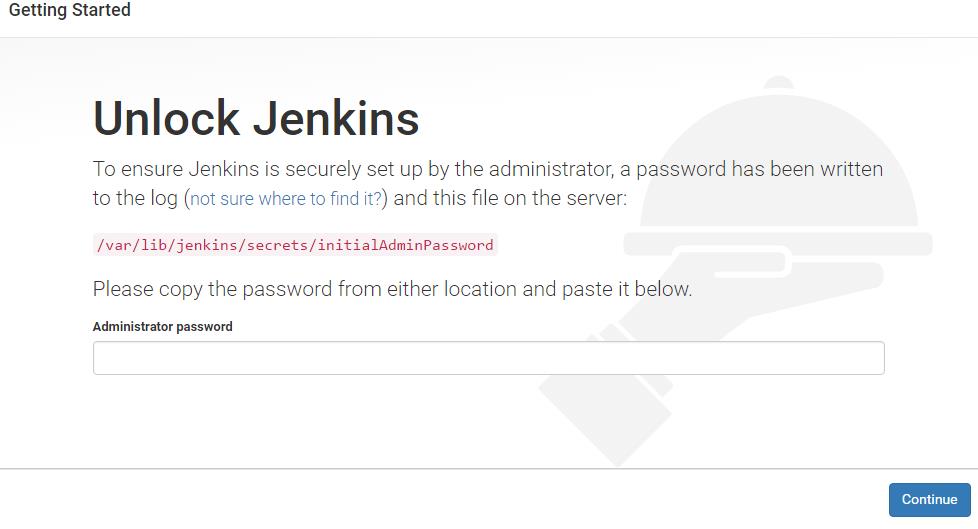
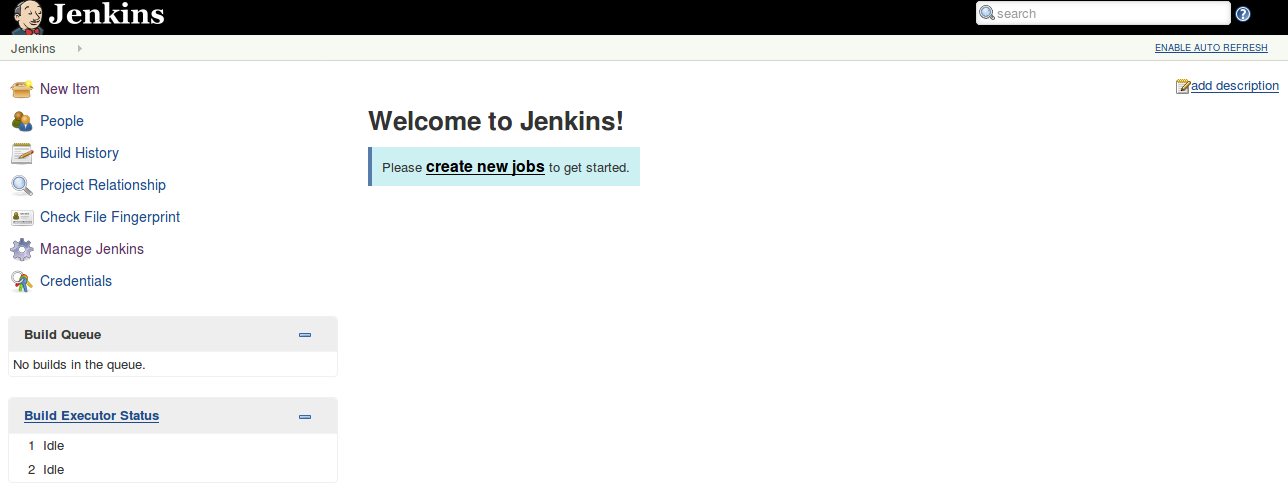
When finished, you should see a screen similar to the below one.
Integrating GitHub with Jenkins
The integration of GitHub with Jenkins automates deployment, testing and improves products quality while saving a significant amount of time of developers. Follow the below steps to integrate GitHub with Jenkins:
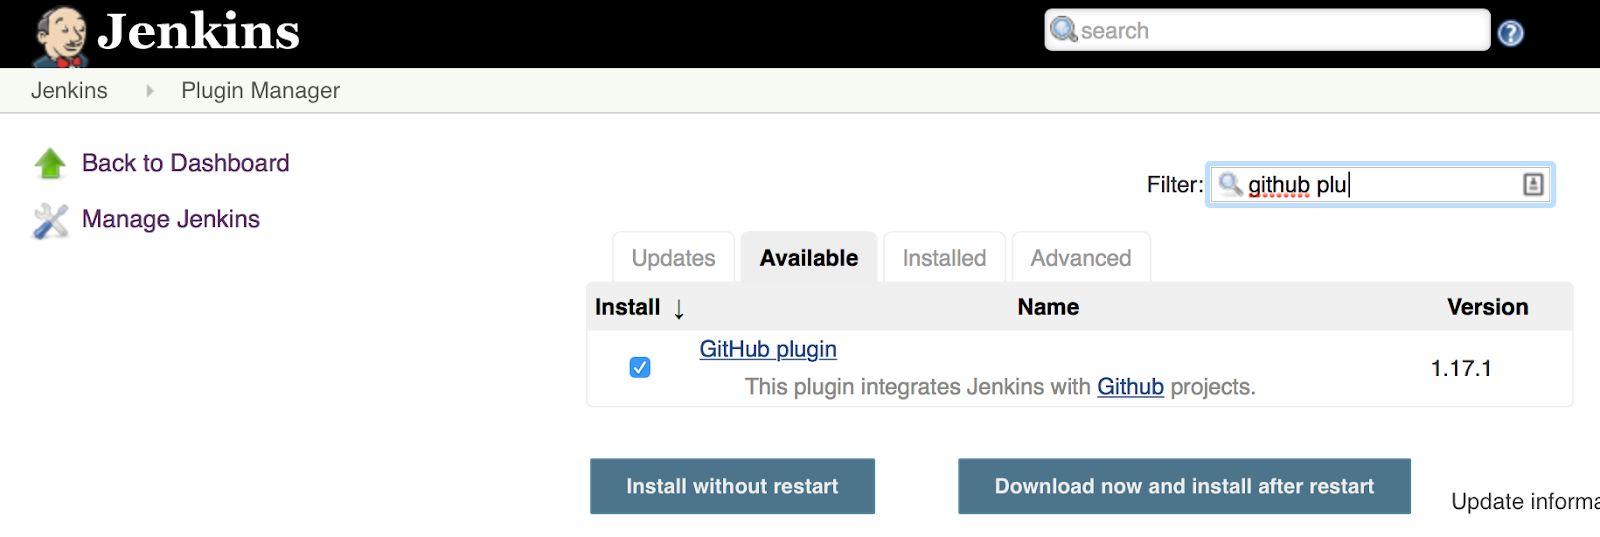
Prerequisite: Install GitHub Jenkins plugin.
Step 1 Go to Manage Jenkins -> Manage Plugin.
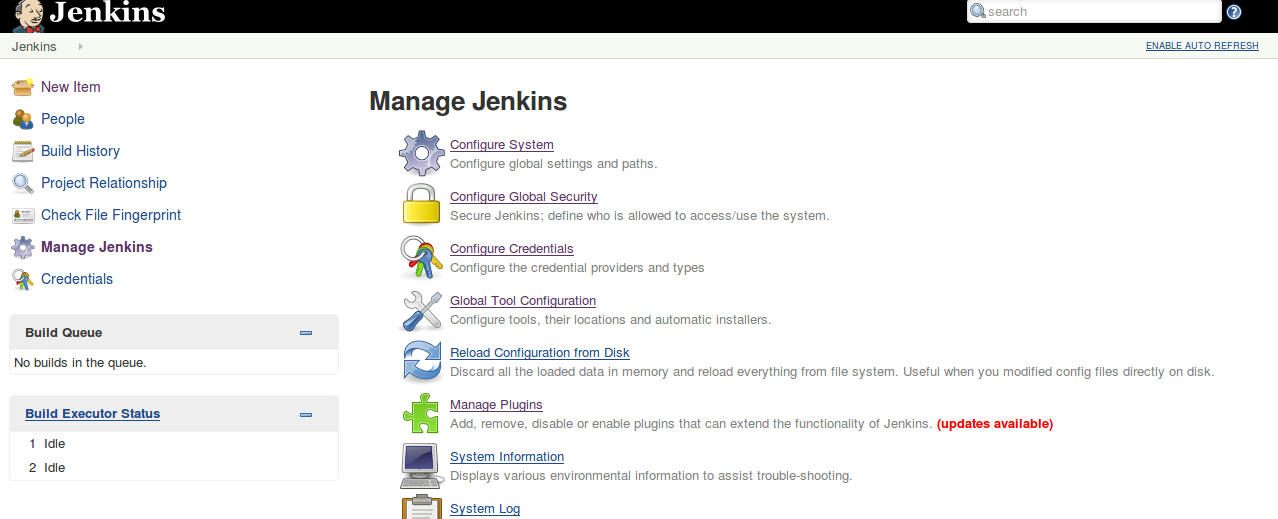
Step 2 Search Github Plugin in the Available tab then click on Download now and install after the restart.
Creating a Jenkins job
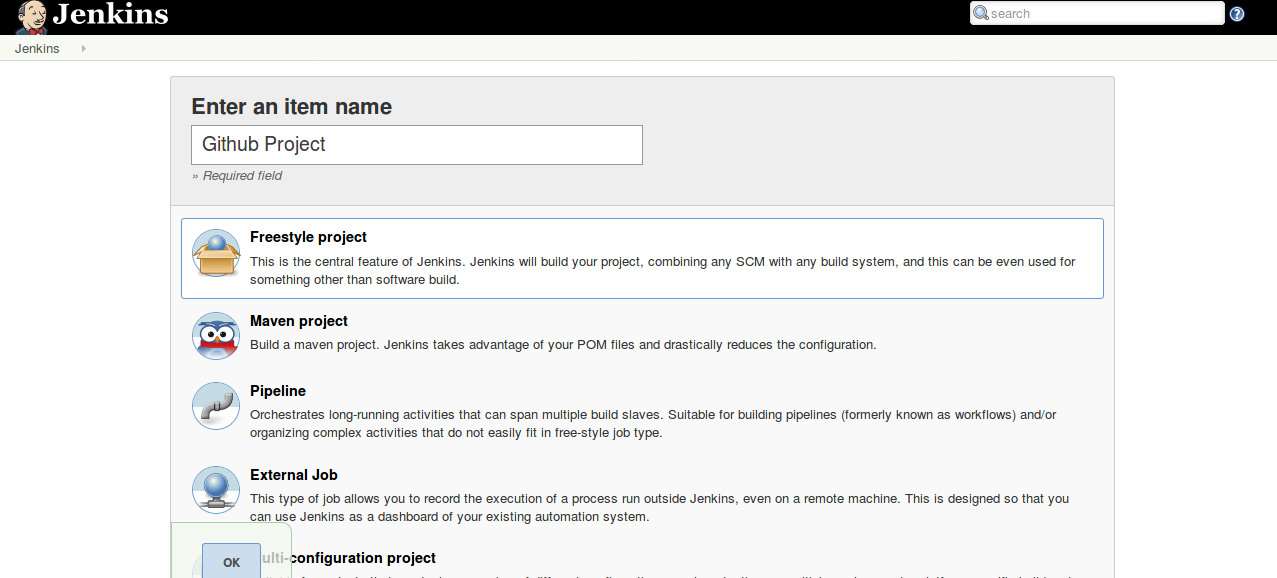
Step 1 To Create a new task for Jenkins, click on “New Item” then enter an item name that is suitable for your project and select Freestyle project. Now click Ok.
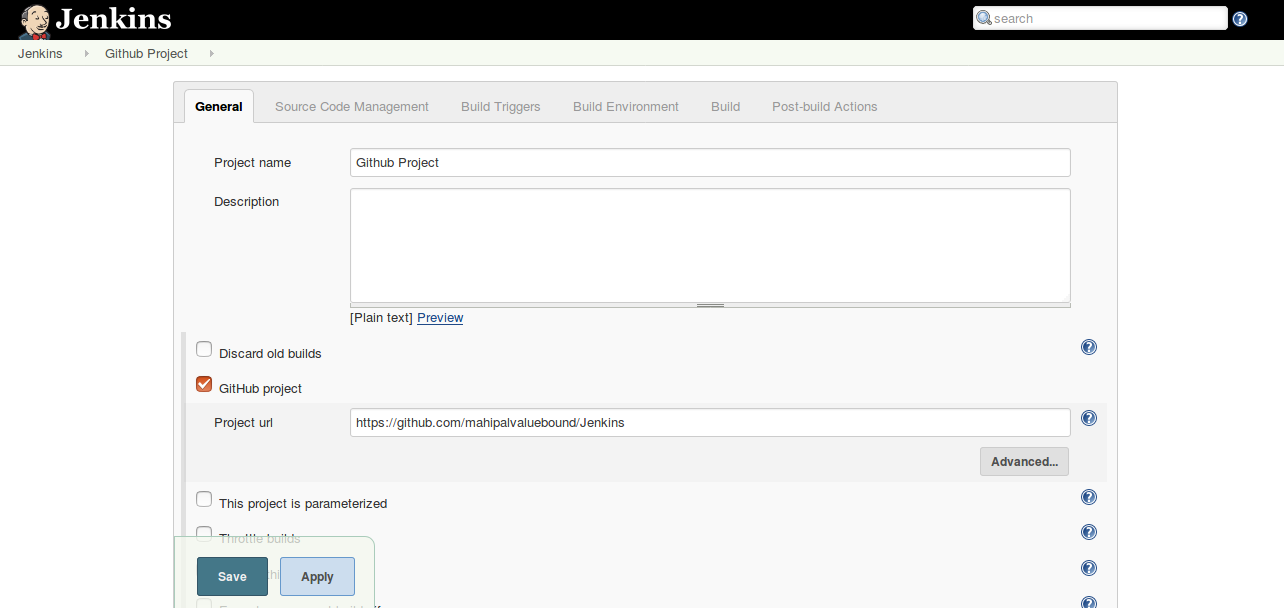
Step 2 Select the GitHub project checkbox and set the Project URL to point to your GitHub Repository.
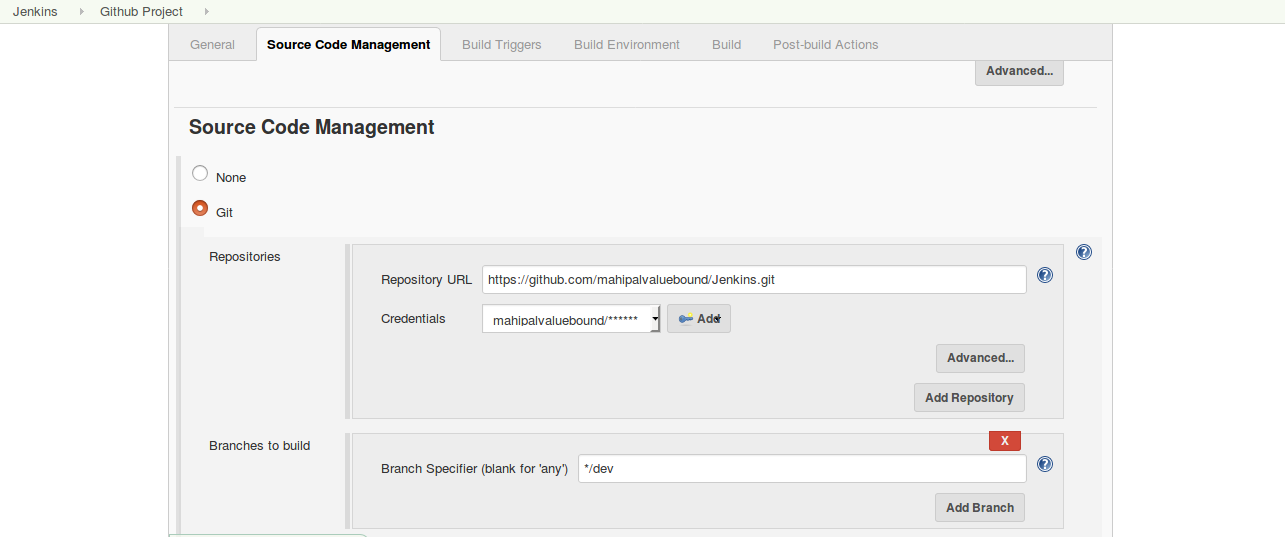
Step 3 Under Source Code Management tab, select Git and then set the Repository URL to point to your GitHub Repository.
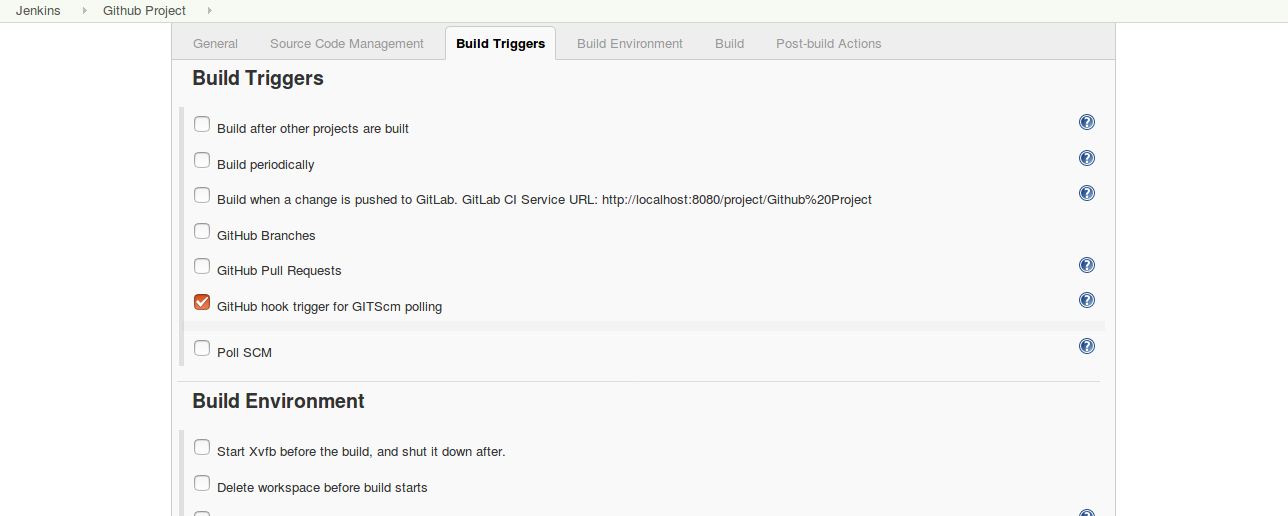
Step 4 Now Under Build Triggers tab, select the “Build when a change is pushed to GitHub” checkbox.
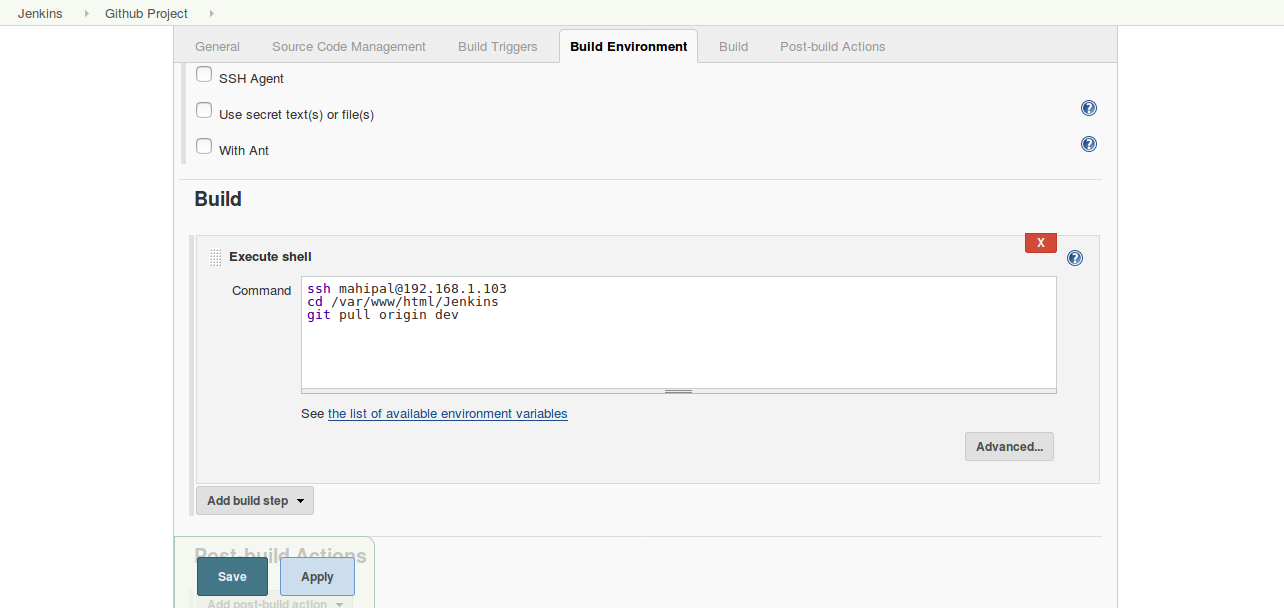
Step 5 At the end, execute Shell script to take a clone from dev. When the configuration is done, click on save button.
Configuring GitHub for Jenkins
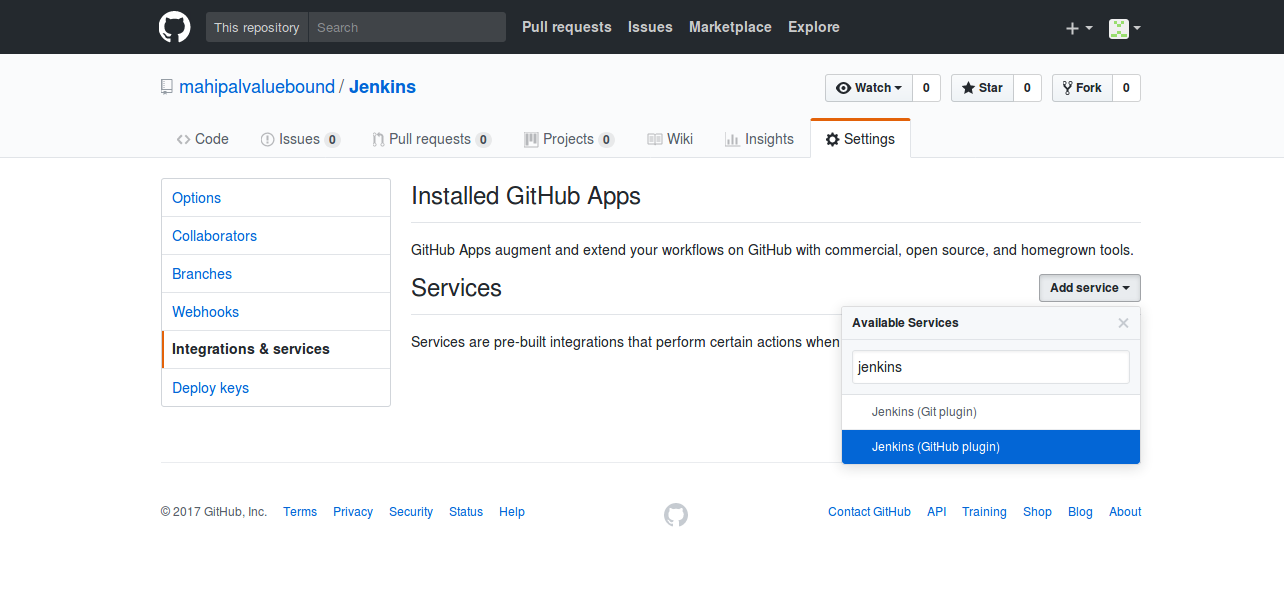
Step 1 Install the Jenkins (GitHub plugin) on a git repository.
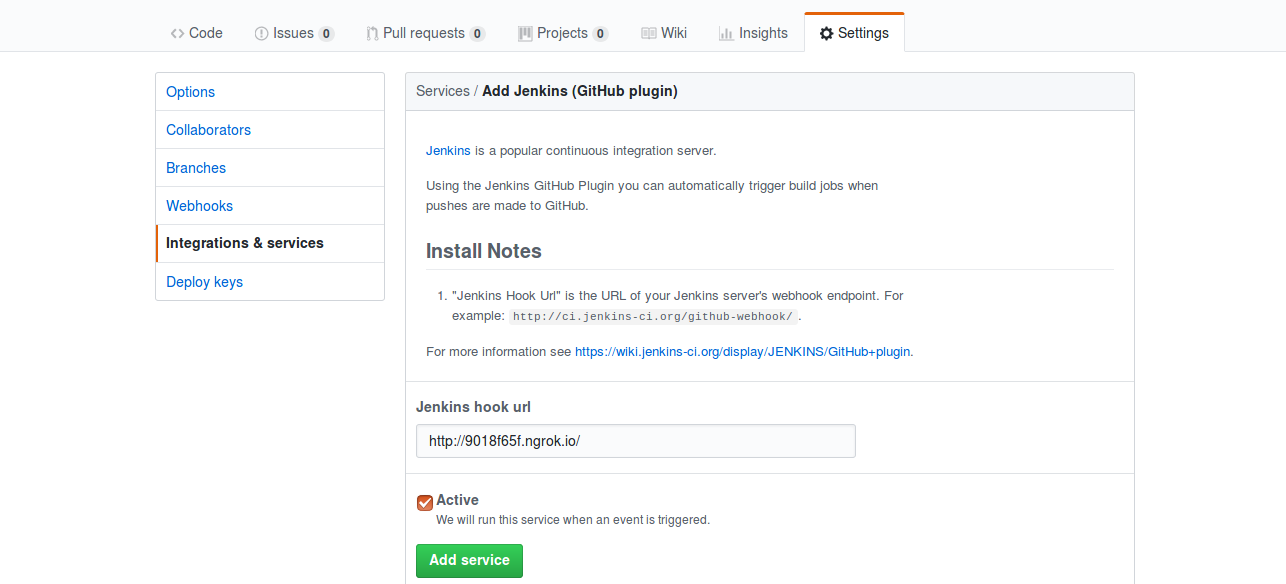
Step 2 Now set the Jenkins hook URL as the URL for your machine.
Note: Github will not accept Local URL, hence, we need to install ngrok software to create live URL for port 8080. Here you can find complete guide for configuration: https://ngrok.com/download
Phew. That was quite the ride!
Every time you publish changes to GitHub, it will trigger new Jenkins job. Now you know an entire process of continuous integration with Jenkins and GitHub. Similarly, you can integrate Jenkins with selenium to automate testing. Go ahead and try it on your own software development. Note that computers don't get bored so while they handle deployment and testing, you're free to do other important works.
Related: Drupal 8 applications using Drush Aliases
Is there anything you'd like to clarify or see further clarified about Jenkins and GitHub? Let me know in the comments below!
Below given is a presentation on Continuous Integration with Jenkins and GitHub
