In order to have a strong online presence, it's significant to offer an amazing digital experience to customers. And for this, offering a seamless experience to content managers is extremely important. To achieve this one of very important aspect is making digital assets available at different web properties to editors while they are creating content. These assets should be searchable with meta information as well as other related information. Bynder is one such digital asset management system that allows easy access to your digital file.
Let’s have a look what Bynder is and how to integrate it with Drupal 8 web application to import digital files into content pieces.
First thing first, Bynder is a cloud-based platform that helps marketers to create, find, and use digital content. Every brand that leverages media, graphics, and documents for marketing or sales efforts is a great fit to use Bynder. It is a digital content library that understands the ways in which marketers need to use the content.
Further, the integration of Bynder with Drupal eliminates the hassle of logging into a different platform to access digital files to content. With this, content managers can use any assets available in their repository system.
Integrating Bynder into a Drupal 8 Site
First, create a Bynder account on www.bynder.com and create API tokens to access the portal using the Drupal module
Module Dependencies:
- Media Entity: Media entity provides a 'base' entity for media.
- Entity Browser: This module provides a generic entity browser/selector.
- DropzoneJS: An open source library that provides drag-drop file uploads feature with image previews.
Library Dependencies:
- DropjoneJS: Download this library and add it inside the libraries folder.
- ImagesLoaded: This library detects when images are loaded. Download from https://github.com/desandro/imagesloaded and add it inside the libraries folder.
- Masonry: It is a grid layout library. Download from https://github.com/desandro/masonry/releases and add it inside the libraries folder.
Installation:
Step 1 Enable the Bynder module via drush - drush en bynder
Step 2 At this point you should be prompted to update the Composer dependencies.
Step 3 Make sure all the packages are installed correctly in your vendor folder - default path is /vendor
Step 4 Bynder needs the "bynder/bynder-php-sdk": "^1.0" . The directory /vendor/bynder/bynder-php-sdk should be present after the composer update.
Configuration:
Step 1 Go to admin/config/services/bynder
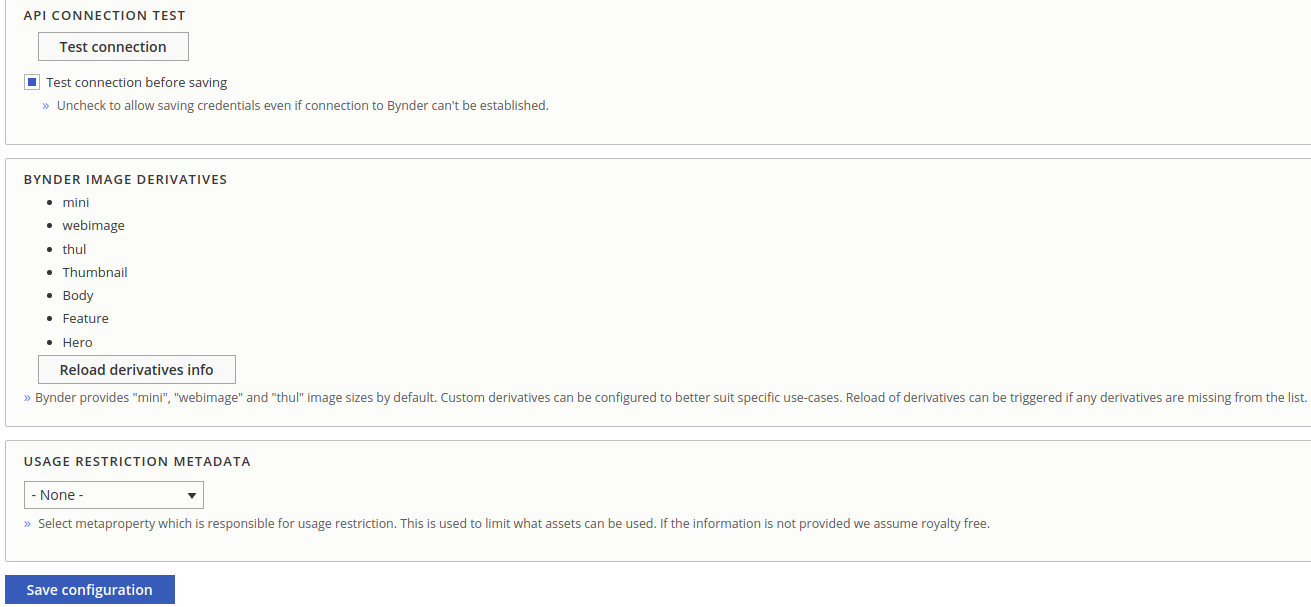
Step 2 Fill the configuration form with your Bynder API token details. The details will include Consumer Key, Consumer Secret, Token, Token Secret and Account domain.
Step 3 Save the form to fetch the derivatives and brand information from the Bynder portal
Step 4 The jQuery version should be set to 1.7 or higher for content add/edit pages.
Step 5 Test the Bynder connection from the configuration page and Reload Derivatives. Every time a new Derivative is created in Bynder side, derivatives reloads on the Drupal site.

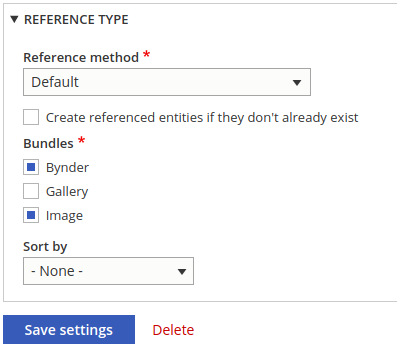
Step 6 Bynder provides a default media entity that can be referred to a Drupal content-type. Select Bynder and image media type as shown in the below
screenshot.

Step 7 Create an entity browser to upload and select Bynder media:
Create an entity browser from “/admin/config/content/entity_browser” and then select the entity browser from Manage Form Display (/admin/structure/types/manage/article/form-display) for the content-type in which you want to select images from Bynder.

Step 8 Attach Bynder media in a content.
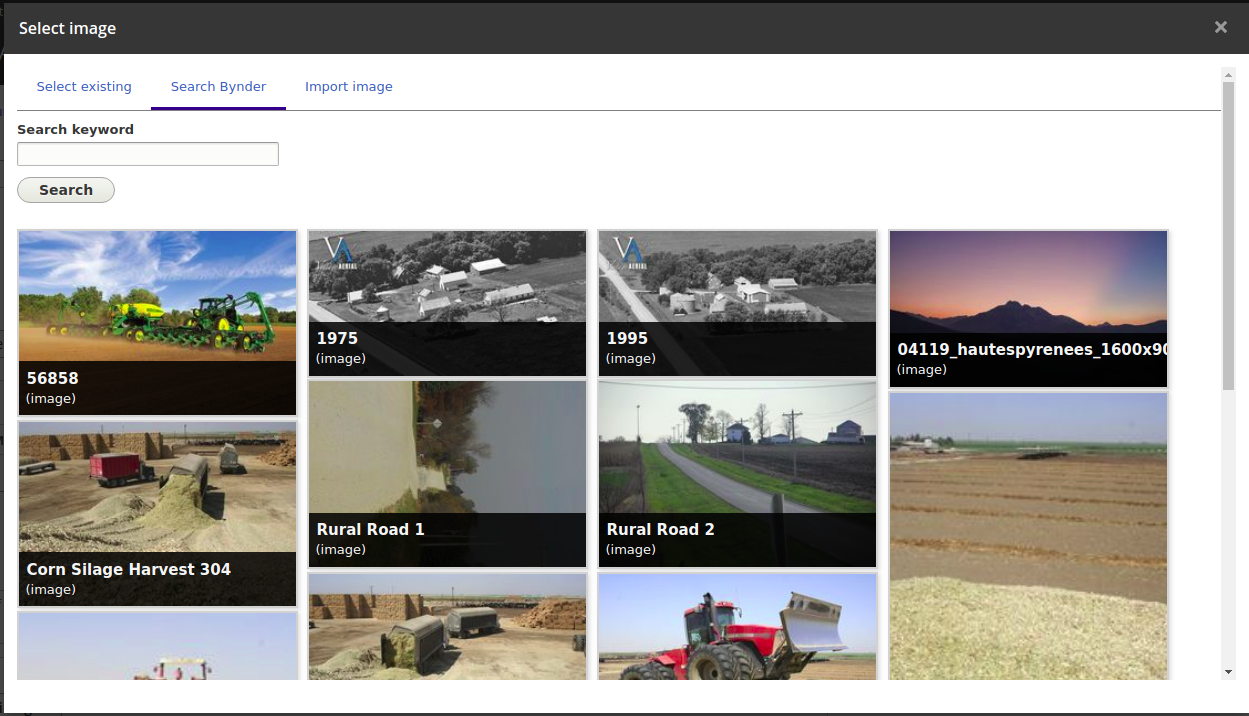
A Bynder media can be added to a content from the node add/edit form. The entity reference field stores the references to Bynder assets. A popup opens by clicking the upload asset button. Go to the Bynder Search Tab and select an image.
Note: Log in to the Bynder repository to upload an image from node creation form.

Step 9 Uploading an image to Bynder
Through Bynder’s uploader widget, you can also upload images from Drupal to the Bynder Repository.
That’s it. This is how Bynder, a data asset management system, is one such tool that eases content management work of any publishing house. I believe after completing this tutorial, you will have a better understanding of how Bynder works? How to install and configure it? Once the setup is completed upload images to your Account Domain and starts using those on the Drupal site.


