This blog will walk you through one the contributed module in Drupal community that has been a heave of sigh for me whenever I was in trouble for web building activity. A couple of weeks back, I have been assigned a task where the requirement was to enable ‘Benton-sans Regular’ font throughout the site. Initially, I thought it would be an easy task and can be done easily. But I was wrong.
No issues! If you facing similar difficulties. Here, I am going to discuss how you can enable ‘Benton-sans Regular’ font seamlessly using Drupal font-your-face module.

Earlier, I thought of writing a custom CSS for all the basic usable tags like
,,
,
,
,
,
,
,,,
- , and
Icon fonts (https://www.drupal.org/project/iconfonts)
Google fonts (https://www.drupal.org/project/google_fonts)
sweaver (https://www.drupal.org/project/sweaver)The reason behind choosing font-your-face module is that it offers admin interface to manage and apply new fonts. With this module, admin can also add module through CSS selector and enable font for the sub-theme.
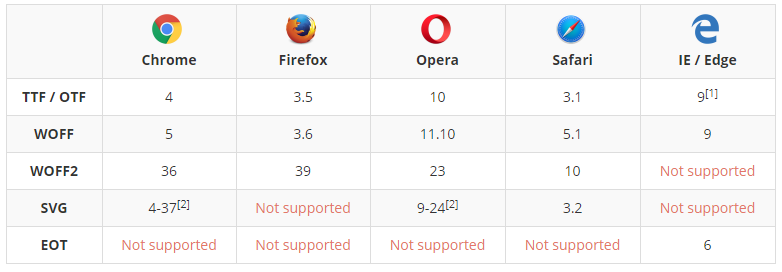
Prerequisites: Font file is required to enable Font. Here format should be EOT(embedded opentype) or TTF (truetype fonts) or WOFF (Web open font format), SVG (Scalable vector Graphics font format). Below is the list of the browser that supports Font format type.
Let’s start by enabling the contributed module.

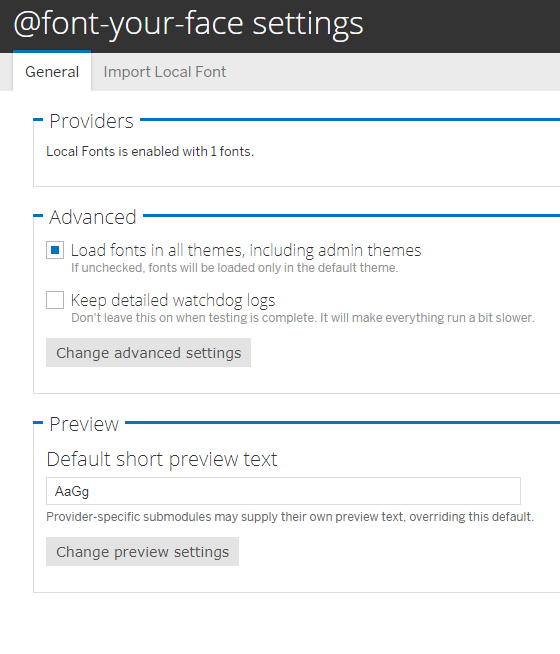
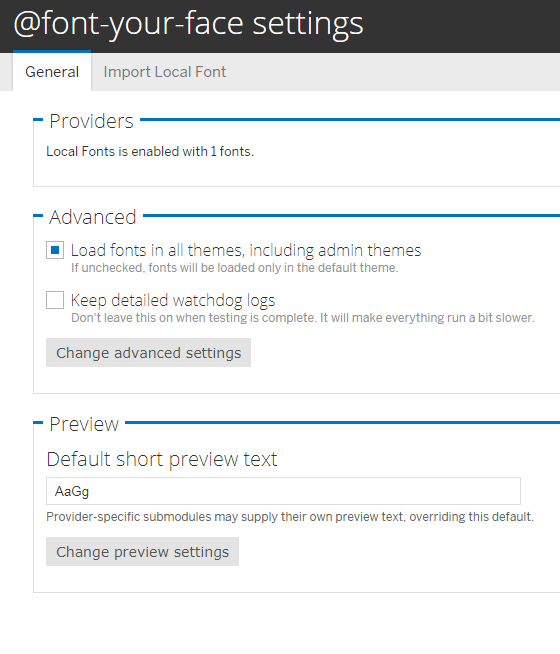
Here Providers display enabled font count, Advanced provides a checkbox (see below) and Preview holds sample text to be displayed while previewing enabled font.
Checkbox
Select the ‘Load fonts in all themes, including themes’ checkbox
Note: While adding a new font to the site, admin can provide basic information like font name, style of the font (Normal, Italic, Oblique), CSS font weight (Normal, bold, Bolder, lighter, 100, 200, 300, …..900).
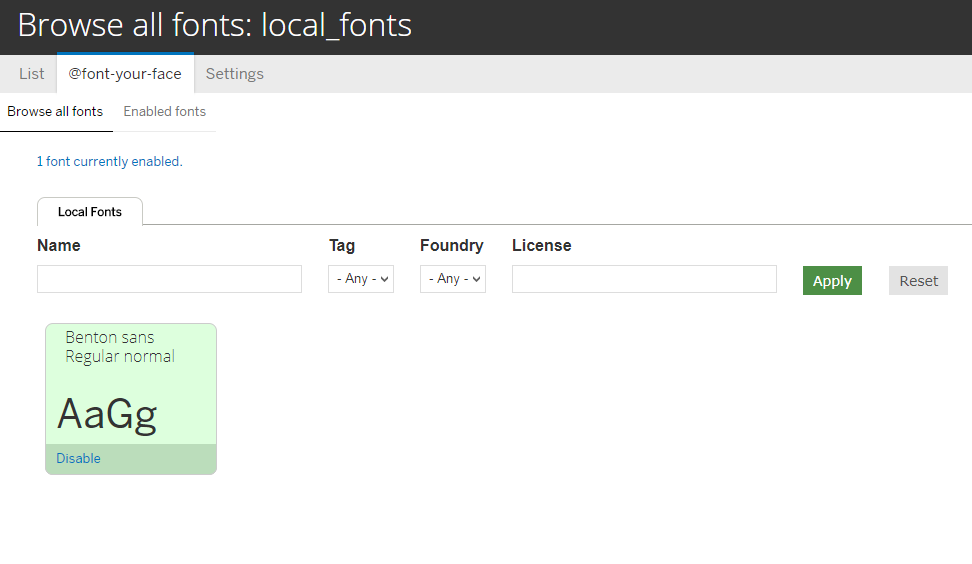
By Font: This tab allows you to add CSS selector class. Select the checkbox and save the setting.
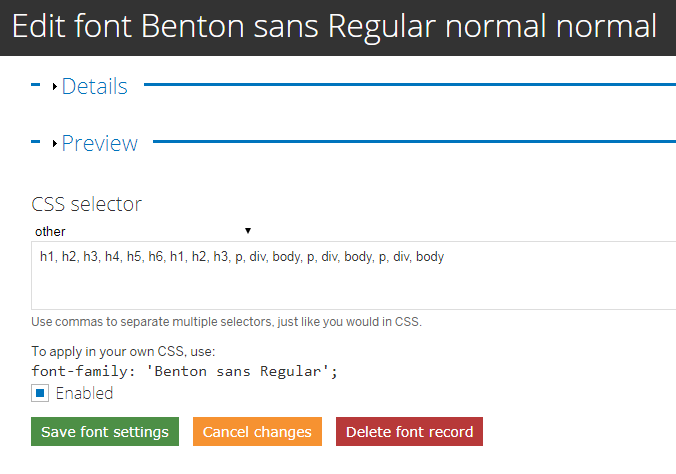
Once you save the setting, Font tab will start listing up Enabled Fonts.

By CSS Selector: This tab lists HTML tag where admin can individually assign a font to each tag. Now click on save applied fonts.
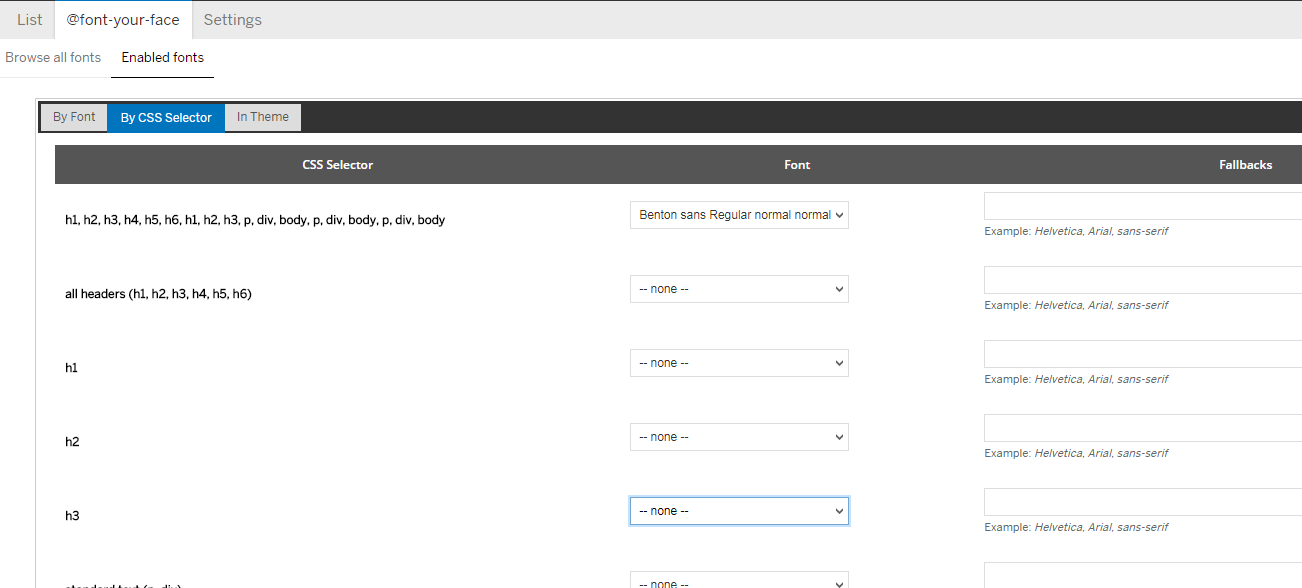
After assigning a new font to the desired tags, you can see the font reflection while loading the page.
Note: Don’t forget to clear the cache.
That's it! The above steps are walk-through for ‘@fontyourface’contributed module that supports multiple service provider like Typekit.com, google font, font.com, font Squirrel and Fontdeck. There are many other lightweight modules available in drupal.org that you can choose as per your requirement.
We, at Valuebound, recommend trying out multiple font styles to find out what works well for your current project or requirements. Also, we invite you to comment below or ask any questions you may have.
-
- Go for the normal installation as we do for all contributed module.
- Click on Configure button, it will redirect you to 127.0.0.1/local/admin/config/user-interface/fontyourface
- Now under General quick tab, you can see three different options: Providers, Advanced and Preview
- Load fonts in all themes, including admin themes.
- Keep detailed watchdog logs
- Import Local Font quick tab having Font information fieldset with multiple font type upload option.
- Now upload your choice of Font file like EOT/TTF/ WOFF/ SVG and click on confirm button.
- When you will submit the font, it will reflect on https://127.0.0.1/admin/appearance/fontyourface/browse/local_fonts. See below.
- Now under @font-your-face, enable fonts tab that has three sub-tabs, namely:
- By Font
- By CSS Selector
- In Themes
-
