Forms can be used in collecting data through any source, for example, site or application. They are based on the structure of nested arrays. Drupal 9 Form API is used to create and process forms in custom modules. They are similar to the Form APIs of Drupal 7 and Drupal 8. There are two types of forms:-
- Config Forms - They can be defined as administrator forms.
- Custom Forms - It allows us to create custom fields and methods.
“\Drupal\Core\Form\FormInterface” is implemented by form classes. Form API workflow is dependent on four main methods i.e. getFormId, buildForm, validateForm, and submitForm. While requesting any form, we can define it using a nested array “$form” which is easily renderable. We can use different abstract classes to provide a base class to form. Those classes are: FormBase, ConfigFormBase, and ConfirmFormBase.
To learn how to create a custom form in Drupal 9, we would create a custom module exposing a custom form that is used as a student registration form.
Step 1: Creating a custom module in the custom folder.
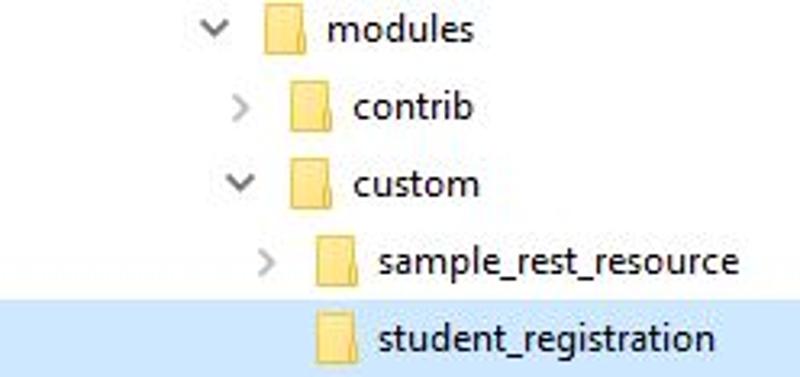
Follow path “\web\modules\custom”. “student_registration” is the module name here.

Step 2: Creating an info.yml file followed by a .module file.
In our case, it will be “student_registration.info.yml” and “student_registration.module”.
After adding info and module file, the folder structure will look like the following snapshot:

Step 3: Creating a routing.yml file
For learning process, In this blog we would create, “student_registration.routing.yml”.
A route can be defined as a path where we return some content. A routing file contains the path by which our module can be accessed. A route path can also be called a path alias. Using the path alias defined in the routing file we can execute the callback function.
A routing file is divided into four basic parts:-
- {name} - It is a path parameter or element which is used as $name in the controller. Here, “student_registration.form”.
- {path_name} - It is an alias that is used to access the page. Here, “/student-registration”.
- {title} - It can be defined as the title of the page. Here, “Student Registration Form”.
- {module_name} - It is the name of a custom module. Here, “student_registration”.
Step 4: Creating Form folder in custom module. Follow the folder structure shown in the snapshot below.

Step 5: Creating Custom Form “RegistrationForm” and adding namespace along with use cases in custom form.

A “namespace” is used to organize form classes into virtual folders and make sure that these classes do not conflict with one another.
A “use” is used to bring the dependency of core classes to our custom class.
Step 6: Implementing getFormId() to define a unique id for the form.
Step 7: Implementing buildForm() to build and process the form using a given unique id.
Step 8: Implementing validateForm() to validate the values of the form via the controller.
Step 9: Implementing submitForm() to process the form submission, only if the form has passed all validation checks.
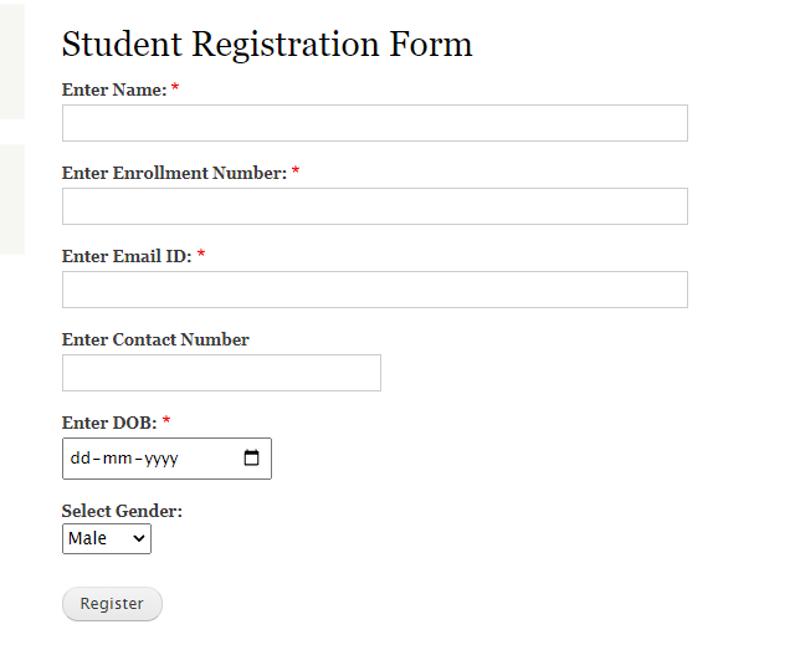
A complete form will look like this:
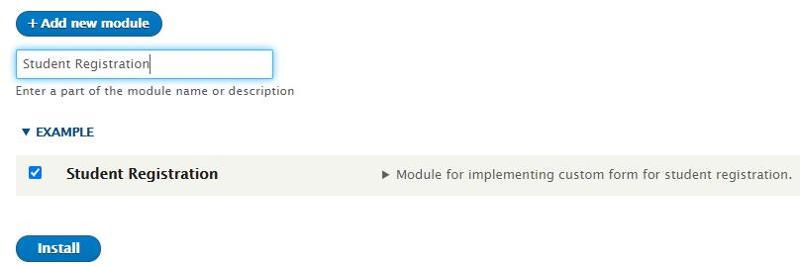
Step 10: Enabling our custom module in the Drupal 9 site.

Step 11: Visit the path we have defined in the routing file to access our form. Here it shall be “/student-registration”.

Fill the form and hit “Register”.
Step 12: After submitting the form we can view the result as a message.

By evolving through Drupal 7, Drupal 8, and now to Drupal 9, we learned how we left some hooks [hook_menu()] behind and got a replacement in the form of controllers, routes/aliases defined in yml or yaml files. We can use Form API to build forms with extended inputs, complex forms, and so on using minimal code.
FORM ASSISTANCE – DRUPAL 9 EXPIRES SOON


